The evolution of cloud computing has ushered in an era of containerization, revolutionizing application deployment and management. AWS Fargate, a serverless compute engine for containers, provides a powerful solution for running containerized applications without managing servers. This guide offers a structured exploration of deploying and managing containers on Fargate, examining the core concepts and practical implementation steps.
This analysis will delve into the benefits of Fargate, contrasting it with other AWS container orchestration services like ECS and EKS. It will Artikel the necessary prerequisites, from setting up your AWS environment to configuring the AWS CLI and IAM roles. The process of building, packaging, and deploying container images to ECR, along with defining ECS task definitions and creating ECS clusters, will be dissected.
Furthermore, we will explore networking, load balancing, monitoring, and logging strategies for containerized applications on Fargate.
Introduction to AWS Fargate and Containerization
AWS Fargate offers a serverless compute engine for containers, enabling users to run containerized applications without managing the underlying infrastructure. This eliminates the operational overhead associated with provisioning, scaling, and maintaining servers, allowing developers to focus on building and deploying applications. Containerization, at its core, packages software and its dependencies into a self-contained unit, promoting portability and consistency across different environments.
Benefits of Using AWS Fargate
Fargate provides several advantages for running containerized applications. These benefits streamline operations, enhance scalability, and reduce management burdens.
- Serverless Operation: Fargate eliminates the need to manage servers. Users do not have to provision, configure, or scale virtual machines, reducing operational complexity and freeing up resources for application development.
- Simplified Scaling: Fargate automatically scales the underlying infrastructure based on the needs of the containerized applications. Users can define the desired resources (CPU and memory), and Fargate handles the scaling, ensuring optimal performance and resource utilization. This dynamic scaling is particularly beneficial for applications with fluctuating workloads.
- Improved Security: Fargate isolates each container, enhancing security. Each container runs in its own isolated environment, minimizing the impact of potential security breaches. This isolation improves the overall security posture of the applications.
- Cost Optimization: With Fargate, users pay only for the resources consumed by their containers. This pay-as-you-go model can lead to significant cost savings compared to managing and maintaining a fixed infrastructure, especially for applications with variable workloads.
- Focus on Application Development: By abstracting away the infrastructure management, Fargate allows developers to focus on building and deploying applications. This increased focus on application development accelerates the development cycle and improves time-to-market.
Comparison of Fargate versus ECS and EKS
AWS provides multiple container orchestration services, including Elastic Container Service (ECS), Elastic Kubernetes Service (EKS), and Fargate. Each service offers different levels of management and control.
- ECS: ECS is a fully managed container orchestration service. It allows users to run containers on EC2 instances or Fargate. ECS offers a balance between control and management, suitable for various use cases. Users have more control over the underlying infrastructure when using EC2 instances with ECS.
- EKS: EKS is a managed Kubernetes service. Kubernetes is a powerful and flexible container orchestration platform, ideal for complex deployments. EKS provides a managed Kubernetes control plane, reducing the operational overhead associated with Kubernetes management. Users can choose to run their containers on EC2 instances or Fargate with EKS.
- Fargate: Fargate is a serverless compute engine for containers. It simplifies container management by eliminating the need to manage servers. Fargate is best suited for applications where users prioritize ease of use and do not require granular control over the underlying infrastructure.
The following table summarizes the key differences between ECS, EKS, and Fargate:
| Feature | ECS | EKS | Fargate |
|---|---|---|---|
| Management | Managed service with control over infrastructure (EC2) or serverless (Fargate) | Managed Kubernetes service with control over infrastructure (EC2) or serverless (Fargate) | Serverless compute engine |
| Infrastructure Management | Requires managing EC2 instances (when not using Fargate) | Requires managing EC2 instances (when not using Fargate) | No infrastructure management |
| Orchestration | ECS | Kubernetes | ECS and EKS |
| Control | More control with EC2, less with Fargate | More control with EC2, less with Fargate | Less control |
| Complexity | Medium | High | Low |
Core Concepts of Containerization
Containerization is a virtualization method that packages application code, libraries, and dependencies into a single unit, called a container. This approach promotes portability, consistency, and efficiency in application deployment.
- Containers vs. Virtual Machines: Containers differ from virtual machines (VMs). VMs virtualize the entire operating system, while containers virtualize only the application and its dependencies. This makes containers more lightweight, faster to start, and more resource-efficient than VMs.
- Container Images: A container image is a read-only template that contains the application code, runtime, system tools, system libraries, and settings needed to run a container. Images are created from Dockerfiles, which define the instructions for building the image.
- Container Registries: Container registries store and manage container images. Public registries, such as Docker Hub, and private registries, such as Amazon Elastic Container Registry (ECR), allow users to store, share, and deploy container images.
- Container Runtime: A container runtime is the software that executes containers. Docker is the most popular container runtime. Other runtimes include containerd and CRI-O.
“Containerization isolates applications and their dependencies, providing consistency across different environments and simplifying deployment.”
Advantages of Using Containers for Microservices Architectures
Containers are particularly well-suited for microservices architectures, where applications are built as a collection of small, independently deployable services. This approach offers several benefits.
- Independent Deployment: Containers allow each microservice to be deployed independently. This allows for faster release cycles and reduced risk, as changes to one service do not affect other services.
- Scalability: Containers enable independent scaling of microservices. Each service can be scaled up or down based on its individual resource requirements. This optimizes resource utilization and ensures optimal performance.
- Technology Agnostic: Containers allow each microservice to be built using different technologies and programming languages. This provides flexibility and allows teams to choose the best tools for each service.
- Improved Fault Isolation: Containerization isolates each microservice, improving fault isolation. If one service fails, it does not necessarily impact the other services. This enhances the overall resilience of the application.
- Resource Efficiency: Containers are lightweight and resource-efficient, which helps to optimize resource utilization. This can lead to cost savings, especially in cloud environments.
Prerequisites

To successfully deploy and manage containerized applications on AWS Fargate, a well-configured AWS environment is essential. This section Artikels the necessary AWS services, account configurations, and network infrastructure required to get started.
AWS Services and Accounts
The following AWS services and account configurations are fundamental for running containers on Fargate. Understanding their roles is crucial for efficient deployment and management.
- AWS Account: A valid AWS account is the foundational requirement. This account serves as the central point for managing all AWS resources and incurring associated costs.
- IAM (Identity and Access Management): IAM is used to control access to AWS resources. It is critical to create IAM roles that grant the necessary permissions to Fargate tasks and other related services. This principle of least privilege should be followed.
- VPC (Virtual Private Cloud): A VPC provides an isolated network environment for your containers. It allows you to define subnets, security groups, and network access control lists (ACLs) to control network traffic.
- ECS (Elastic Container Service): ECS is the service that manages the container orchestration. You will define tasks, services, and clusters within ECS to run your containers on Fargate.
- Fargate: Fargate is the serverless compute engine for containers. It eliminates the need to manage underlying infrastructure, such as EC2 instances.
- ECR (Elastic Container Registry): ECR is a fully managed container registry where you store and manage your container images. This allows for versioning and easy deployment.
- AWS CLI (Command Line Interface): The AWS CLI is a command-line tool that enables you to interact with AWS services. It simplifies the process of configuring and managing resources.
Configuring the AWS CLI and IAM Roles
The AWS CLI needs to be configured correctly to interact with your AWS account. IAM roles are then set up to provide the necessary permissions for Fargate to function correctly.
First, install and configure the AWS CLI. The process involves installing the CLI on your local machine and then configuring it with your AWS credentials. The configuration includes specifying your AWS Access Key ID, Secret Access Key, default region, and output format.
Next, create the necessary IAM roles. These roles define the permissions granted to your Fargate tasks. For instance, an IAM role for an ECS task might include permissions to:
- Access ECR: Allows the task to pull container images from your ECR repository.
- Write to CloudWatch Logs: Enables the task to send logs to CloudWatch for monitoring and troubleshooting.
- Network access: Grants access to your VPC and associated network resources.
The creation of IAM roles is often performed using the AWS Management Console, the AWS CLI, or infrastructure-as-code tools like Terraform. Each role should be tailored to the specific needs of the containerized application, adhering to the principle of least privilege. For example, a task that only needs to read data from an S3 bucket should only be granted read access, not full access.
Setting Up a VPC, Subnets, and Security Groups
A well-defined VPC, subnets, and security groups are critical for the security and networking of your containerized applications. This configuration provides isolation, control, and access management.
VPC Configuration: Create a VPC with a CIDR block that provides a sufficient address space for your application. This CIDR block should not overlap with any other networks you connect to. The VPC serves as the private network for your containers.
Subnet Configuration: Within the VPC, create at least two subnets, one in each availability zone for high availability. Each subnet should have a CIDR block that is a subset of the VPC’s CIDR block. Public subnets allow outbound internet access, while private subnets restrict inbound access.
Security Group Configuration: Security groups act as virtual firewalls that control inbound and outbound traffic to your containers. Create security groups to allow specific traffic based on ports and protocols. For example, a security group for a web application might allow inbound traffic on port 80 (HTTP) and port 443 (HTTPS). Security groups operate at the instance level, allowing granular control over network access.
Example of VPC setup (Illustrative, actual configuration varies based on needs):
- VPC CIDR: 10.0.0.0/16
- Subnet 1 (Public, Availability Zone us-east-1a) CIDR: 10.0.1.0/24
- Subnet 2 (Public, Availability Zone us-east-1b) CIDR: 10.0.2.0/24
- Subnet 3 (Private, Availability Zone us-east-1a) CIDR: 10.0.3.0/24
- Subnet 4 (Private, Availability Zone us-east-1b) CIDR: 10.0.4.0/24
In this example, public subnets would typically have an internet gateway attached, allowing outbound internet access. Private subnets would be used for backend services and would not have a direct connection to the internet. Security groups would be associated with the ECS tasks and would define the allowed traffic based on the application’s needs. For instance, a load balancer might be placed in the public subnets, and the backend containers in the private subnets.
The security groups would control access between the load balancer and the containers.
Creating an ECR Repository
An ECR repository is where you store your container images. This step involves creating a repository within ECR, tagging and pushing your container images to the repository, and then deploying those images to Fargate.
Creating an ECR Repository: Create an ECR repository to store your container images. This can be done using the AWS Management Console, the AWS CLI, or infrastructure-as-code tools. The repository name should be descriptive of the image being stored.
Tagging and Pushing Images: Before pushing your container images, you must tag them with the correct repository URI and tag. This ensures that the images are correctly associated with your ECR repository. After tagging, you can push the images to the repository using the Docker CLI.
Example command to tag and push an image:
docker tag your-image:latest <your-account-id>.dkr.ecr.<region>.amazonaws.com/your-repository:latest docker push <your-account-id>.dkr.ecr.<region>.amazonaws.com/your-repository:latest
In this example, replace <your-account-id>, <region>, and your-repository with your actual AWS account ID, the AWS region, and the name of your ECR repository, respectively. The ‘latest’ tag is commonly used, but you can also use other tags to manage different versions of your image.
Image Deployment: Once the images are in ECR, they can be deployed to Fargate by specifying the repository URI and tag in your ECS task definition. ECS will then pull the images from ECR when launching the containers.
Building and Packaging Container Images
Containerization, at its core, relies on the creation and management of container images. These images are immutable, lightweight, standalone, and executable packages that include everything needed to run a piece of software, including the code, runtime, system tools, system libraries, and settings. This section details the process of constructing and deploying these images specifically for use with AWS Fargate.
Creating a Dockerfile for a Sample Application
The Dockerfile is a text document that contains all the instructions a user could call on the command line to assemble an image. It serves as the blueprint for building a Docker image, specifying the base image, dependencies, and commands required to run the application.Consider a simple Python web server using Flask. A Dockerfile for such an application might look like this:“`dockerfileFROM python:3.9-slim-busterWORKDIR /appCOPY requirements.txt .RUN pip install –no-cache-dir -r requirements.txtCOPY .
.EXPOSE 5000CMD [“python”, “app.py”]“`This Dockerfile performs the following actions:
- `FROM python:3.9-slim-buster`: Specifies the base image, in this case, a Python 3.9 image based on Debian Buster. The `slim-buster` variant is chosen for its smaller size, leading to faster image builds and deployments.
- `WORKDIR /app`: Sets the working directory inside the container to `/app`. All subsequent commands will be executed within this directory.
- `COPY requirements.txt .`: Copies the `requirements.txt` file (which lists the project’s Python dependencies) from the current directory to the working directory in the container.
- `RUN pip install –no-cache-dir -r requirements.txt`: Installs the Python dependencies listed in `requirements.txt` using `pip`. The `–no-cache-dir` flag is used to reduce the image size by preventing the caching of downloaded packages.
- `COPY . .`: Copies the application code from the current directory to the working directory in the container.
- `EXPOSE 5000`: Declares that the application will listen on port 5000. This doesn’t publish the port but informs Docker about the application’s port usage.
- `CMD [“python”, “app.py”]`: Specifies the command to run when the container starts, in this case, running the Python script `app.py`.
This example provides a streamlined approach to containerizing a Python application, minimizing the image size and maximizing efficiency. The choice of a slim base image and the use of `–no-cache-dir` contribute to faster build times and reduced storage consumption.
Building and Tagging Docker Images
Once the Dockerfile is created, the next step is to build the Docker image. This involves using the `docker build` command. The build process executes the instructions in the Dockerfile sequentially, creating layers that are cached for future builds, optimizing the build process. Tagging the image is crucial for versioning and identifying specific builds.The `docker build` command with tagging can be executed from the directory containing the Dockerfile:“`bashdocker build -t my-python-app:v1.0 .“`This command does the following:
- `docker build`: Invokes the Docker build process.
- `-t my-python-app:v1.0`: Specifies the tag for the image. The tag consists of the image name (`my-python-app`) and a version tag (`v1.0`). This tag helps in versioning and identifying the image.
- `.`: Specifies the build context, which is the current directory. Docker will use the contents of this directory as the source for building the image.
The use of meaningful tags is crucial for managing image versions and rollbacks. Consider the following scenarios:
- Development builds: Use tags like `my-python-app:latest` or `my-python-app:dev`.
- Production releases: Use semantic versioning (e.g., `my-python-app:1.2.3`) for production deployments.
- Specific builds: Use tags incorporating Git commit hashes or build numbers for traceability.
Adopting a consistent tagging strategy is essential for effective image management and deployment in a containerized environment.
Pushing a Docker Image to an ECR Repository
Amazon Elastic Container Registry (ECR) is a fully managed Docker container registry that makes it easy to store, manage, and deploy Docker container images. Pushing the image to ECR is a necessary step to make the image accessible to Fargate.Before pushing the image, you need to authenticate your Docker client with the ECR registry. This is done using the AWS CLI:“`bashaws ecr get-login-password –region
Designing a Strategy for Managing Container Image Versions and Tags
A robust strategy for managing container image versions and tags is crucial for maintaining a stable and manageable containerized application. Effective versioning enables rollbacks, facilitates deployments, and simplifies debugging.Consider these best practices:
- Semantic Versioning (SemVer): Use SemVer (e.g., `1.2.3`) for production releases. This allows you to easily identify breaking changes and new features.
- Tagging Conventions: Establish a consistent tagging convention. Examples include:
- `latest`: Points to the most recent stable version. Use with caution in production.
- `v1.0`, `v1.1`, `v2.0`: Specific versions.
- `feature-branch-name-commit-hash`: For development and testing branches.
- Automated Tagging: Integrate tagging into your CI/CD pipeline. Automatically tag images with build numbers, commit hashes, or branch names.
- Image Immutability: Treat images as immutable. Once an image is built and tagged, it should not be modified. Create a new image for any changes.
- Image Cleanup: Implement a strategy to clean up old and unused images in ECR to avoid storage costs. Consider using lifecycle policies in ECR.
Implementing these practices leads to a more reliable and maintainable containerized environment. For instance, a SemVer-based approach allows you to easily identify and deploy specific versions of your application, facilitating rollbacks if a new release introduces issues. Automated tagging streamlines the build and deployment process, reducing the risk of human error. The use of lifecycle policies in ECR can prevent excessive storage costs by automatically deleting old images.
Defining an ECS Task Definition
An ECS Task Definition is a blueprint for your application, describing the containers that will be launched, their configurations, and resource requirements. It’s a crucial step in deploying and managing containerized applications on AWS Fargate. This definition provides a declarative specification, enabling consistency and reproducibility across deployments.
Organizing the Process of Creating an ECS Task Definition
Creating an ECS Task Definition involves several key steps, each critical for ensuring the proper functioning of your application. The process is best approached sequentially, starting with basic container specifications and progressively adding complexity as needed.
- Defining Container Specifications: This involves specifying the container image to use (e.g., from a public or private registry), the command to execute when the container starts, and any entry points. The image is typically pulled from a container registry like Amazon ECR, Docker Hub, or a private registry.
- Configuring Container Networking: This step configures how the container interacts with the network. It involves specifying the network mode (typically `awsvpc` for Fargate), assigning a public IP address if required, and configuring port mappings to expose container ports to the outside world.
- Setting Environment Variables: Environment variables provide a mechanism to configure the application inside the container. They can include database connection strings, API keys, and other configuration parameters that vary between deployments or environments.
- Defining Volumes: Volumes provide persistent storage for the container. These can be used to store application data, logs, or other files that need to survive container restarts. Fargate supports several volume types, including those backed by Amazon Elastic File System (EFS).
- Specifying Resource Allocation: This step defines the CPU and memory resources allocated to each container within the task. Fargate allows you to specify the desired CPU and memory combinations based on your application’s needs. Proper resource allocation is critical for performance and cost optimization.
Configuring Container Networking, Environment Variables, and Volumes
Container networking, environment variables, and volumes are essential for connecting your container to the network, configuring its behavior, and managing persistent data. These configurations enable the container to interact with other services, store data, and receive configuration settings.
- Container Networking: When using Fargate, the `awsvpc` network mode is typically selected. This mode assigns each task its own elastic network interface (ENI), providing a dedicated network stack and isolating the task from other tasks on the same host. This configuration simplifies network management and enhances security. Port mappings are configured to expose container ports to the outside world. For example, mapping port 80 on the container to port 80 on the task allows HTTP traffic to reach the application.
- Environment Variables: Environment variables are key-value pairs that are injected into the container’s environment at runtime. They are used to configure application behavior, often containing sensitive information like database credentials or API keys. Environment variables can be defined directly within the task definition or retrieved from AWS Secrets Manager or Systems Manager Parameter Store for secure management. For example:
"name": "DATABASE_URL",
"value": "jdbc:mysql://mydb.example.com:3306/mydb"This defines an environment variable `DATABASE_URL` with the specified connection string.
- Volumes: Volumes provide persistent storage for containers. Fargate supports different volume types, including those backed by Amazon EFS. Volumes are defined in the task definition and mounted within the container. For example, to mount an EFS volume to the container at `/mnt/data`:
"volumes": ["name": "efs-volume",
"efsVolumeConfiguration":
"fileSystemId": "fs-xxxxxxxx",
"rootDirectory": "/"],
"mountPoints": ["sourceVolume": "efs-volume",
"containerPath": "/mnt/data",
"readOnly": false]
Detailing Resource Allocation (CPU and Memory) for Fargate Tasks
Resource allocation in Fargate is critical for optimizing performance and cost. You specify the CPU and memory requirements for your tasks, and Fargate provisions the necessary infrastructure. The correct allocation ensures your application has sufficient resources while minimizing unnecessary costs.
Fargate offers various CPU and memory combinations, allowing you to tailor resource allocation to your application’s needs. These combinations are predefined, and you choose the one that best fits your workload. For example, you might select 0.5 vCPU and 1 GB of memory for a small application or 4 vCPU and 8 GB of memory for a more resource-intensive application.
The choice of resources impacts both performance and cost. Under-provisioning can lead to performance bottlenecks, while over-provisioning can lead to wasted resources and increased costs.
When defining resource allocation, consider the following factors:
- Application Requirements: Analyze your application’s CPU and memory usage under typical and peak loads. Use monitoring tools to gather this data.
- Container Image Size: Larger container images might require more memory to load and run efficiently.
- Traffic Volume: Higher traffic volumes might require more CPU to handle requests.
- Cost Optimization: Experiment with different resource configurations to find the optimal balance between performance and cost. AWS Cost Explorer can help you analyze your costs.
Providing Examples of Common Task Definition Configurations
Task definitions can be tailored to various application types and deployment scenarios. The following examples illustrate common configurations, highlighting the flexibility and versatility of Fargate.
- Simple Web Application: A basic web application might use a single container with an image from Docker Hub. The task definition would specify the container image, port mappings (e.g., port 80), and resource allocation (e.g., 0.5 vCPU and 1 GB of memory). Environment variables would configure the application. The network mode would be `awsvpc`.
- Microservices Architecture: A microservices architecture could involve multiple containers within a single task, each representing a different microservice. Each container would have its own image, resource allocation, and port mappings. Service discovery mechanisms (e.g., AWS Cloud Map) would be used to enable communication between the microservices. Volumes can be shared between containers within a task if needed.
- Stateful Applications with Persistent Storage: For stateful applications like databases, you can use volumes backed by Amazon EFS or Amazon EBS. The task definition would define the volume configuration and mount it within the container. Resource allocation would be higher to accommodate the database’s needs. Environment variables would specify database connection parameters.
- Batch Processing Jobs: Batch processing jobs might use a container to execute a script or program. The task definition would specify the container image, the command to execute, and resource allocation based on the job’s requirements. Volumes can be used to access input data and store output results. The task would typically be launched as part of an ECS service configured with a scheduled task or a one-off task.
Creating and Configuring an ECS Cluster
The successful deployment of containerized applications on AWS Fargate hinges on the proper configuration of an Elastic Container Service (ECS) cluster. This involves setting up the underlying infrastructure and defining the operational parameters that govern container execution and management. This section Artikels the steps involved in creating and configuring an ECS cluster, including networking considerations and the role of ECS services.
Creating an ECS Cluster
Creating an ECS cluster is the foundational step for orchestrating containerized applications. The AWS Management Console and the AWS Command Line Interface (CLI) offer distinct methods for achieving this.Creating an ECS cluster through the AWS Management Console involves a guided process. The user navigates to the ECS service, selects “Create Cluster,” and chooses the “Fargate” cluster type. Subsequent steps include specifying a cluster name, optionally configuring container insights, and reviewing the configuration before cluster creation.
This approach simplifies the process, making it accessible even to users with limited command-line experience.The AWS CLI provides a programmatic approach to cluster creation, enabling automation and integration into infrastructure-as-code workflows. The `aws ecs create-cluster` command is used to initiate cluster creation. This command accepts parameters such as the cluster name, tags, and the default capacity provider strategy, enabling customization and control over cluster resources.
The CLI approach is particularly beneficial for automating cluster deployment as part of a broader infrastructure setup.
Configuring Networking for the ECS Cluster
Proper network configuration is crucial for enabling communication between containers, external services, and the internet. This configuration typically involves Virtual Private Cloud (VPC) setup, security group management, and subnet selection.The ECS cluster must be associated with a VPC to provide a private and isolated network environment. This VPC defines the network boundaries and allows for controlled access to resources. The subnets within the VPC determine where the Fargate tasks will be launched.
Public subnets enable tasks to have public IP addresses, allowing them to communicate directly with the internet, while private subnets require the use of a NAT gateway or other network address translation mechanisms for outbound internet access.Security groups act as virtual firewalls, controlling inbound and outbound traffic for the tasks within the cluster. They define rules that specify which traffic is allowed to and from the tasks based on source IP addresses, ports, and protocols.
Configuring security groups appropriately is essential for protecting applications from unauthorized access and ensuring secure communication.
Managing Tasks with ECS Services
ECS services play a critical role in managing and maintaining the desired state of containerized applications. They define the number of tasks to run, the deployment strategy, and the load balancing configuration.An ECS service ensures that the specified number of tasks are running and restarts tasks if they fail. This self-healing capability provides high availability and resilience. Services also manage the deployment process, allowing for updates to be rolled out with minimal downtime.
Load balancing, often achieved using an Elastic Load Balancer (ELB), distributes traffic across the running tasks, improving application performance and scalability.The service configuration includes parameters such as the task definition, the desired number of tasks, the load balancer configuration, and the deployment strategy. These parameters define the operational characteristics of the service and how it manages the underlying tasks. The deployment strategy determines how updates are rolled out, such as the rolling update strategy, which replaces tasks one at a time, minimizing disruption.Here’s an example of an ECS service configuration, illustrated in a table:
| Configuration Parameter | Description | Example Value | Importance |
|---|---|---|---|
| Service Name | The name assigned to the ECS service. | my-web-service | Used for identifying and managing the service within the ECS cluster. |
| Task Definition | Specifies the container image, resource requirements, and other container-related configurations. | arn:aws:ecs:us-east-1:123456789012:task-definition/my-app-task-definition:1 | Defines the application to be run by the service. |
| Desired Task Count | The number of tasks the service should maintain. | 3 | Ensures the desired number of application instances are running. |
| Load Balancer | Configures the integration with an Elastic Load Balancer (ELB) for traffic distribution. | Target Group ARN: arn:aws:elasticloadbalancing:us-east-1:123456789012:targetgroup/my-target-group/abcdef1234567890 | Distributes traffic across the tasks, providing high availability and scalability. |
Deploying and Running Containers on Fargate

Deploying and running containers on AWS Fargate involves several crucial steps to ensure the application is operational, scalable, and resilient. This process starts with defining the service and task definition, proceeds through deployment, and concludes with monitoring the health and status of the running containers. Each step contributes to the overall reliability and efficiency of the containerized application.
Creating and Deploying an ECS Service
Creating an ECS service leverages the previously defined task definition to manage and run containerized applications. This service acts as a blueprint for running and maintaining the desired number of container instances (tasks).To create and deploy an ECS service, the following steps are generally performed:
- Service Creation: The user specifies the cluster in which the service will run, the task definition to use, the desired number of tasks, and other configurations such as the load balancer integration (if required). The AWS Management Console, AWS CLI, or Infrastructure as Code (IaC) tools like Terraform or CloudFormation can be utilized for this.
- Task Launch: Based on the service configuration, ECS launches the specified number of tasks. Each task represents a running instance of the container defined in the task definition. Fargate handles the underlying infrastructure management, ensuring tasks are scheduled and running.
- Load Balancing (Optional): If a load balancer is configured in the service, ECS automatically registers the running tasks with the load balancer. This enables the distribution of incoming traffic across the tasks.
- Deployment Process: When updates are made (e.g., a new version of the container image), the service can be updated to deploy the new version. This often involves a rolling update strategy, where ECS replaces the existing tasks with new tasks, minimizing downtime.
Scaling the Number of Tasks
Scaling the number of tasks running in an ECS service is essential for handling fluctuating workloads and ensuring application availability. This can be done manually or automatically based on defined scaling policies.Scaling can be achieved through:
- Manual Scaling: Users can manually adjust the desired count of tasks in the ECS service through the AWS Management Console, AWS CLI, or API calls. This is suitable for predictable workloads or when immediate adjustments are needed.
- Automatic Scaling: Auto Scaling policies can be configured to automatically adjust the number of tasks based on metrics such as CPU utilization, memory utilization, or custom metrics. These policies define scaling triggers (e.g., CPU utilization exceeding a threshold) and actions (e.g., increase or decrease the number of tasks).
- Integration with AWS Auto Scaling: ECS integrates with AWS Auto Scaling to enable more sophisticated scaling strategies. Auto Scaling groups can be configured to manage the capacity of the ECS cluster and the number of tasks within the service.
For example, consider an e-commerce website experiencing a surge in traffic during a flash sale. An auto-scaling policy can be configured to increase the number of tasks running the web application container when CPU utilization exceeds 70%. Conversely, the number of tasks can be decreased during periods of low traffic to optimize resource utilization and cost.
Accessing the Deployed Application
Accessing the deployed application depends on the configuration of the ECS service, specifically how the application is exposed to the outside world. The most common approach involves using a load balancer.
- Load Balancer Integration: When an ECS service is configured with a load balancer (e.g., Application Load Balancer or Network Load Balancer), the load balancer distributes incoming traffic across the running tasks. The load balancer provides a single entry point for accessing the application.
- Service Discovery (Optional): For internal communication between services within the same VPC, ECS service discovery can be used. This allows services to locate each other without hardcoding IP addresses.
- Public IP Addresses (Less Common): In some cases, tasks can be configured with public IP addresses. However, this is less common for production deployments due to security and scalability considerations.
For instance, if an Application Load Balancer is configured, the load balancer’s DNS name can be used to access the application. The load balancer then routes traffic to the running tasks. The configuration of the load balancer, including security groups and listeners, must be correctly set up to allow traffic to reach the application.
Monitoring the Health and Status of Running Containers
Monitoring the health and status of running containers is crucial for identifying and resolving issues, ensuring application availability, and optimizing performance. AWS provides several tools for monitoring ECS services and tasks.Monitoring tools include:
- CloudWatch Metrics: ECS automatically publishes metrics to Amazon CloudWatch, including CPU utilization, memory utilization, network traffic, and task status. These metrics can be used to create dashboards, set alarms, and trigger auto-scaling policies.
- CloudWatch Logs: Container logs are automatically sent to CloudWatch Logs. These logs provide valuable insights into the application’s behavior and can be used for troubleshooting.
- Service Health Checks: ECS can perform health checks on the tasks. These checks verify the application’s health and availability. Tasks that fail health checks are automatically replaced.
- AWS X-Ray (Optional): For more detailed performance monitoring and tracing, AWS X-Ray can be integrated with the application. This allows developers to trace requests as they flow through the application and identify performance bottlenecks.
For example, an alarm can be configured in CloudWatch to trigger a notification if the CPU utilization of a service exceeds a predefined threshold. This alerts the operations team to potential performance issues. By regularly reviewing CloudWatch metrics and logs, administrators can proactively identify and resolve problems, ensuring the application’s stability and performance.
Networking and Load Balancing
Configuring networking and load balancing is crucial for enabling external access, distributing traffic, and ensuring the high availability of containerized applications deployed on AWS Fargate. This section details the necessary steps to establish a robust and scalable network infrastructure.
Configuring an Application Load Balancer (ALB)
An Application Load Balancer (ALB) is a critical component for distributing incoming traffic across multiple Fargate tasks, enabling high availability and scalability.To configure an ALB for Fargate tasks, several key steps are required:
- Create the Load Balancer: Within the AWS Management Console, the ALB must be created. The type should be Application Load Balancer, and it needs to be configured within the same VPC as the ECS cluster. Configure the listener, typically on port 80 or 443, depending on whether HTTP or HTTPS is used.
- Define Target Groups: A target group is required to direct traffic to the Fargate tasks. When creating the target group, choose “IP addresses” as the target type since Fargate tasks are assigned private IP addresses. The target group configuration should specify the protocol (HTTP or HTTPS) and the port used by the application. Health checks are also configured within the target group to monitor the health of the tasks.
The health check path is a URL endpoint that the load balancer periodically probes to ensure the tasks are running and responsive.
- Register Targets: After creating the target group, associate it with the ECS service. This involves configuring the service to use the load balancer and target group. ECS automatically registers and deregisters tasks with the load balancer as they are launched and terminated. This dynamic registration ensures traffic is always routed to healthy tasks.
- Security Group Configuration: The security group associated with the ALB should allow inbound traffic on the listener ports (e.g., 80 or 443) from the internet or any source IP addresses, depending on the application’s access requirements. The security group associated with the Fargate tasks should allow inbound traffic from the ALB’s security group on the application’s port.
Setting Up DNS Records
Setting up DNS records allows users to access the application using a human-readable domain name instead of the load balancer’s IP address or DNS name.To set up DNS records for accessing the application:
- Choose a Domain Name: Select a domain name for the application. If a domain name isn’t already owned, it needs to be registered through a domain registrar.
- Use Amazon Route 53 (Recommended): AWS Route 53 is a highly available and scalable DNS service. Create a hosted zone in Route 53 for the chosen domain.
- Create an Alias Record: Within the Route 53 hosted zone, create an alias record that points to the ALB. When creating the alias record, select the ALB as the target. Route 53 will automatically resolve the alias record to the IP addresses of the ALB.
- Configure DNS Propagation: After creating the DNS records, allow time for the DNS changes to propagate across the internet. The propagation time can vary depending on the Time to Live (TTL) setting of the DNS records. A lower TTL value leads to faster propagation, but can increase DNS query traffic.
Configuring Security Groups
Security groups act as virtual firewalls that control the inbound and outbound traffic for both the ALB and the Fargate tasks. Properly configuring security groups is crucial for securing the application.The security group configuration involves the following:
- ALB Security Group: The ALB’s security group should allow inbound traffic on the listener ports (e.g., 80 for HTTP or 443 for HTTPS) from the internet or the client’s IP addresses. It should also allow outbound traffic to the Fargate tasks on the application’s port.
- Fargate Task Security Group: The security group associated with the Fargate tasks should allow inbound traffic from the ALB’s security group on the application’s port. This configuration ensures that only traffic originating from the ALB is allowed to reach the tasks. Outbound traffic from the tasks should be allowed to the internet or other necessary services, such as databases.
- Network Access Control Lists (NACLs): NACLs provide an additional layer of security at the subnet level. While security groups operate at the instance level, NACLs control traffic at the subnet level. Configure NACLs to allow the necessary traffic to and from the subnets where the ALB and Fargate tasks are deployed. NACLs are evaluated before security groups, providing an additional layer of defense.
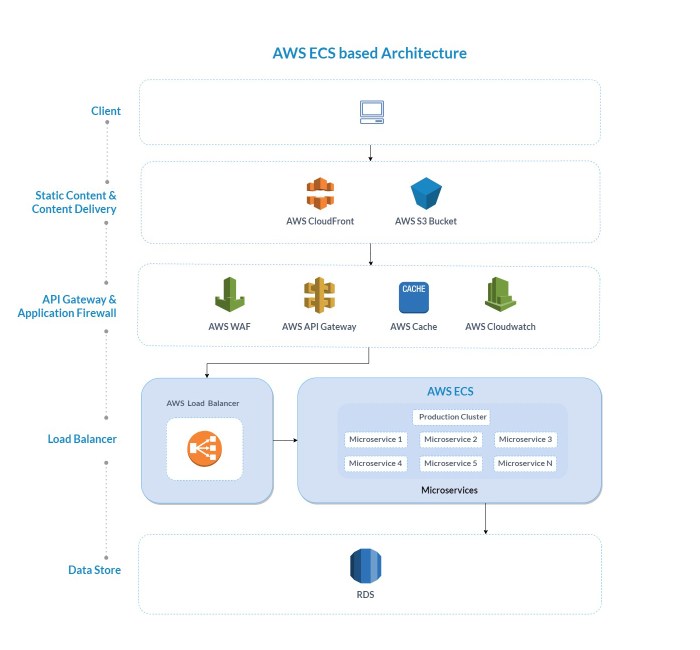
Network Architecture Diagram
A network architecture diagram illustrates the flow of traffic and the components involved in deploying containerized applications on Fargate.The diagram shows the following key components and their interactions:
- Internet: Represents the source of incoming traffic.
- Route 53: A DNS service that resolves the application’s domain name to the ALB’s IP address.
- Application Load Balancer (ALB): Distributes traffic across multiple Fargate tasks. The ALB resides within a public subnet.
- Security Group (ALB): Controls inbound traffic to the ALB.
- VPC (Virtual Private Cloud): A logically isolated section of the AWS cloud where the application runs.
- Public Subnets: Subnets where the ALB is deployed. These subnets have a route to the internet gateway.
- Private Subnets: Subnets where the Fargate tasks are deployed. These subnets typically do not have direct access to the internet, enhancing security.
- ECS Cluster: Manages and orchestrates the Fargate tasks.
- Fargate Tasks: Containerized application instances. They reside within the private subnets.
- Security Group (Fargate Tasks): Controls inbound traffic to the Fargate tasks, typically allowing traffic only from the ALB.
The traffic flow is as follows:
- A user accesses the application using the domain name.
- Route 53 resolves the domain name to the ALB’s IP address.
- The ALB receives the traffic and forwards it to a healthy Fargate task based on its routing rules.
- The Fargate task processes the request and sends a response back to the ALB.
- The ALB forwards the response back to the user.
The diagram emphasizes the importance of security groups in controlling the flow of traffic and ensuring the security of the application. The ALB acts as the entry point, and the Fargate tasks handle the application logic. The use of private subnets and security groups provides a secure and scalable architecture.
Monitoring and Logging
Effective monitoring and logging are crucial for maintaining the health, performance, and security of containerized applications running on AWS Fargate. These practices provide insights into application behavior, facilitate troubleshooting, and enable proactive responses to potential issues. Implementing robust monitoring and logging allows for continuous improvement and optimization of the containerized environment.
Setting Up Logging with CloudWatch Logs
CloudWatch Logs is the primary logging service provided by AWS for collecting, monitoring, and storing log data from various sources, including containerized applications running on Fargate. Configuring CloudWatch Logs involves directing container logs to a specific log group, where they can be analyzed and accessed.To configure logging for a Fargate task:
- Configure the Task Definition: Within the ECS task definition, specify the logging driver for each container. This is typically done by setting the `logConfiguration` parameter in the container definition. The `logDriver` should be set to `awslogs`.
- Specify Log Group and Region: The `logConfiguration` also includes parameters to define the CloudWatch Logs log group and the AWS region where the logs will be stored. If the log group doesn’t exist, ECS will create it automatically.
- Permissions: Ensure the IAM role associated with the ECS task has the necessary permissions to write logs to CloudWatch Logs. This requires the `logs:CreateLogStream` and `logs:PutLogEvents` permissions.
- Log Format: The format of the logs is typically dictated by the application’s logging library. Container logs often include timestamps, log levels (e.g., INFO, WARNING, ERROR), and relevant application-specific information.
- Accessing Logs: Logs can be accessed through the CloudWatch console, the AWS CLI, or the CloudWatch API. Logs can be filtered based on log groups, log streams, and s.
Example of a simplified task definition snippet (JSON):“`json “containerDefinitions”: [ “name”: “my-app-container”, “image”: “my-ecr-repository/my-app:latest”, “logConfiguration”: “logDriver”: “awslogs”, “options”: “awslogs-group”: “/ecs/my-app-logs”, “awslogs-region”: “us-east-1”, “awslogs-stream-prefix”: “ecs” ]“`This configuration directs container logs to the `/ecs/my-app-logs` log group in the `us-east-1` region.
The `awslogs-stream-prefix` helps organize logs within the log group.
Monitoring Performance of Fargate Tasks with CloudWatch Metrics
CloudWatch provides a comprehensive set of metrics for monitoring the performance of Fargate tasks. These metrics provide insights into resource utilization, task health, and overall application performance. These metrics can be visualized in dashboards, and alerts can be configured to trigger notifications when specific thresholds are exceeded.Key metrics to monitor include:
- CPU Utilization: Measures the percentage of CPU resources being used by the task. High CPU utilization can indicate a performance bottleneck.
- Memory Utilization: Measures the percentage of memory resources being used by the task. High memory utilization can lead to performance degradation or task failures.
- Network In/Out: Measures the amount of network traffic entering and leaving the task. High network traffic can indicate network congestion or potential security issues.
- Disk I/O: Measures the read and write operations on the disk.
- Task Health: Indicates the health status of the task, which can be `RUNNING`, `STOPPED`, or other states.
Accessing and using CloudWatch metrics involves several steps:
- Locate Metrics: In the CloudWatch console, navigate to “Metrics” and then “ECS”. Metrics are automatically published by Fargate for each task.
- Create Dashboards: Create custom dashboards to visualize the metrics over time. This allows for easy monitoring of trends and anomalies.
- Set Granularity: The level of detail for the metrics can be adjusted. Fargate metrics typically provide data at a 1-minute interval.
- Apply Filters: Filter the metrics based on task names, service names, or other dimensions to focus on specific tasks or services.
Setting Up Alarms to Alert on Critical Events
CloudWatch Alarms allow for the creation of automated alerts based on the metrics collected. When a metric breaches a predefined threshold, the alarm triggers an action, such as sending a notification via email, triggering an automated response, or scaling the ECS service.To set up an alarm:
- Select a Metric: Choose the metric to monitor (e.g., CPU utilization, memory utilization) from the CloudWatch metrics.
- Define Thresholds: Specify the threshold values that, when breached, will trigger the alarm. For example, set an alarm to trigger if CPU utilization exceeds 80% for a sustained period.
- Specify Duration: Define the period over which the metric must exceed the threshold to trigger the alarm (e.g., 5 minutes). This helps to prevent false positives caused by short-lived spikes.
- Configure Actions: Configure the actions to be taken when the alarm state changes (e.g., sending an email notification via SNS, triggering an AWS Lambda function).
- Testing: Thoroughly test alarms to ensure they function correctly and trigger alerts under the expected conditions.
Example of an alarm setup (conceptual):A CPU utilization alarm can be set up to monitor the average CPU utilization of a Fargate task. If the average CPU utilization exceeds 80% for five consecutive minutes, an alarm state will be triggered, and a notification will be sent to a specified email address. This can alert the operations team to investigate potential performance issues or consider scaling the service.
Integrating with Other Monitoring Tools
AWS Fargate and CloudWatch integrate seamlessly with other monitoring tools, allowing for a centralized monitoring and alerting strategy. This integration can enhance visibility and enable more advanced analytics.Integration approaches include:
- Third-Party Monitoring Tools: Many third-party monitoring tools (e.g., Datadog, New Relic, Splunk) offer native integrations with AWS and can collect and analyze CloudWatch metrics and logs. This often involves installing an agent or configuring an integration within the monitoring tool.
- Custom Integrations: Utilize the CloudWatch API to extract metrics and logs programmatically. This enables the creation of custom dashboards and alerts within existing monitoring systems.
- EventBridge Integration: CloudWatch can publish events to Amazon EventBridge, allowing for integration with other services, such as AWS Lambda, for advanced processing and automation.
- Log Forwarding: Forward CloudWatch Logs to other systems for long-term storage, analysis, and compliance purposes.
Example of third-party integration:A user might configure Datadog to collect CloudWatch metrics from their Fargate tasks. Datadog would automatically discover the ECS services and tasks, collect CPU, memory, and other relevant metrics, and display them in a custom dashboard. Datadog can also be configured to send alerts based on predefined thresholds, just as CloudWatch Alarms can.
Conclusive Thoughts
In conclusion, this comprehensive guide illuminates the pathway to effectively utilizing AWS Fargate for container deployment. From establishing the AWS environment to meticulously monitoring application performance, each facet of the process has been systematically addressed. Understanding the intricacies of networking, load balancing, and logging is paramount to establishing a robust and scalable containerized application on Fargate. By following these guidelines, developers can leverage the full potential of Fargate, streamlining their deployment pipelines and optimizing resource utilization in a serverless environment.
Detailed FAQs
What is the primary advantage of using Fargate over EC2 for running containers?
The primary advantage of Fargate is its serverless nature, which eliminates the need to manage the underlying infrastructure (servers). This reduces operational overhead and allows developers to focus solely on their applications.
How does Fargate handle scaling?
Fargate automatically scales the resources (CPU and memory) allocated to your containerized applications based on demand. You can configure the desired number of tasks, and Fargate manages the scaling process without requiring manual intervention.
What is the cost model for Fargate?
Fargate uses a pay-as-you-go pricing model. You are charged for the vCPU and memory resources that your containers consume, calculated based on the duration they are running. There are no upfront costs or long-term commitments.
Can I use existing Docker images with Fargate?
Yes, Fargate supports standard Docker images. You can use existing Dockerfiles and container images, provided they are compatible with the Fargate environment.
How do I access my application running on Fargate?
You can access your application by configuring a load balancer (e.g., Application Load Balancer) in front of your Fargate tasks. The load balancer distributes traffic to your containers and provides a public endpoint for accessing the application.